Enter Employees Time
General Time Entry Steps
- From selection screen, choose desired Payroll Area (will default to B1).
- From selection screen, enter any additional parameters if necessary
- Select desired CATS Profile (if different than default)
- Unit Time Administrators have access to a CATS profile called Unit Time Administrator that allows them to scroll back additional pay periods when editing time retroactively. To use this profile, select it from the dropdown list of CATS Profile options.
- Click Submit
Selecting Employee(s)
- You can select one or more employees to enter time for:
- To select a single employee, click the line item selection box to the left of the desired employee.
- To select multiple contiguous employees, click the line item selection box to the left of the first employee, then hold down the Shift key and click the line item selection box to the left of the last employee.
- To select multiple non-contiguous employees, click the line item selection box to the left of the first employee, then hold down the Ctrl key and click the line item selection box to the left of each additional employee.
-
To select all employees click on Table Selection Menu
 and choose Select All
- Click Enter Times
Hourly Pay Employees
When entering time for an hourly employee, select the funding information from the Worklist.
- Multiple accounts can be used during the same time period. Highlight desired row(s) and Click Copy Row to copy the funding information to the Data Entry Area
Entering Attendances and Absences
Entry Screen will default to current time entry period; use the arrows ![]() to the right of the pay period date range to move to past or future pay periods.
to the right of the pay period date range to move to past or future pay periods.
Click in the A/AType field  in the Data Entry Area
Enter or search for and select an attendance or absence type. When searching and selecting, click anywhere on the appropriate option to select it, then click the Copy to confirm the selection. Or double click on appropriate option.
Use the scrollbar to view dates and enter the number of hours worked on each date.
Checking and Saving Entries
- Click Check Entries to validate entries (Optional)
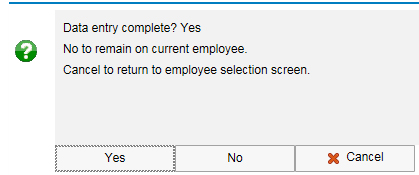
- Click Save
- Click Yes to confirm data entry for this employee is complete
Project Pay Variation
- At the opening screen, under Cats profile, select the Project Pay profile
- Click Submit
- You can select one or more employees to enter time for:
- To select a single employee, click the line item selection box to the left of the desired employee.
- To select multiple contiguous employees, click the line item selection box to the left of the first employee, then hold down the Shift key and click the line item selection box to the left of the last employee.
- To select multiple non-contiguous employees, click the line item selection box to the left of the first employee, then hold down the Ctrl key and click the line item selection box to the left of each additional employee.
-
To select all employees click on Table Selection Menu
and choose Select All
- Click Enter Times
- When entering time for a project pay employee, select the funding information from the Worklist. Multiple accounts can be used during the same time period. Highlight desired row(s) and Click Copy Row to copy the funding information to the Data Entry Area
- Click in the W
age Type field
 in the Data Entry Area. When searching and selecting, click anywhere on the appropriate option to select it, then click Copy to confirm the selection. Or double click on appropriate option.
 - Use the scrollbar to view dates and enter the lump sum dollar amount to pay the employee on any date(s) in the pay period.
Checking and Saving Entries
- Click Check Entries to validate entries (Optional)
- Click Save
- Click Yes to confirm data entry for this employee is complete
Monthly OnCall Variation
- At the opening screen, select the M1 (Monthly pay area)
- At the opening screen, under Cats profile, select the Biweekly profile to have permissible accounts available
- Follow Hourly Pay Employee Instructions
When complete, click Home (house), log out, or search for another application.
Limits on Retroactive and Future Changes
Using Biweekly CATS profile (default) and Project Pay profile: Two past pay periods and two future pay periods.
Using Monthly CATS profile: One past pay period and one future pay period.
Using Unit Time Administrator CATS profile: Four past pay periods and two future pay periods. (Two additional past pay periods.) This profile is available to Unit Time Administrators only.